")


You have a soundbar, you want it to sit nicely as part of your setup… but you don’t just want it to sit in front of your TV. In this guide, we’ll show you how to mount a soundbar to a wall like a professional, so you can match the amazing visuals of your TV with a classy finished look that enhances sound reproduction.

Key takeaways
- Prepare the soundbar and wall
- Find your TV’s centre point
- Find your soundbar’s centre point
- Mark the holes
- Set up your drill
- Use paper envelopes as dust catchers
- Drill each hole
- Clean up and route cables
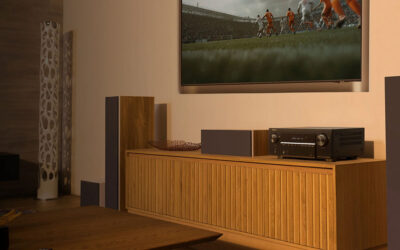
Why mount a soundbar to the wall?
There are a few reasons why someone would want to wall-mount their soundbar. The two obvious ones are acoustics and aesthetics.
Sound-wise, elevating the soundbar closer to ear level offers several advantages to the listener. In truth, positioning isn’t as critical for lower frequencies as some might suggest, since most bass frequencies are omnidirectional – hence why the subwoofer is often separate. However, a soundbar’s main speakers handle mid-range and higher frequencies, which are more directional and better aligned with our hearing.
So, elevation without going above ear level is the goal. It also removes issues like cabinet reflection, which can muffle the soundbar’s sound.
Aesthetically, there is no denying that mounting a soundbar to the wall looks a lot better.
How to mount a soundbar to the wall
1. Prepare the soundbar and wall
Check that your soundbar is wall-mountable, and see if a paper cutout template is provided. You should also make sure you know where your cables will be routed.
Tools you’ll need: spirit level, pencil, paper, rubber, power drill, masonry drill bit, screwdriver and screws, tape measure, suitable rawl plugs for secure wall fixing, wallpaper-friendly masking tape, a bradawl, wall pipe detector, vacuum cleaner, dust cover, calculator, and a couple of new wide envelopes.
Important: TVs draw in air from the bottom, so ensure there is at least 50mm of space between the bottom of the TV and the top of the soundbar to allow for proper airflow.
2. Find your TV’s centre point
With a tape measure, measure the underside of the TV. Divide that measurement by two to find the centre point.
Using the tape measure again and the wallpaper-friendly masking tape or your pencil, add a small line marker on the wall to define the centre point measurement.
3. Find your soundbar’s centre point
Without a template: Rotate the soundbar so you can see the fixing points. Measure its total length and divide by two to find the centre point. Add a piece of masking tape to the rear of the soundbar as a visual marker, and note these measurements down.
Now measure from the centre point to the centre of each wall fixing hole, in both directions, and record these measurements. Then, from each fixing point, measure vertically up to the top edge of the soundbar and note these figures down as well.
We know there needs to be a vertical gap of 50mm, so add this to the vertical measurements taken from the fixing holes to the top of the soundbar. This will give you the true fixing height.
With a template: Measure a gap of 50mm from the bottom of the TV to the top edge of the template’s centre point. Lightly fix the template to the wall using a piece of masking tape.
4. Mark the holes
Without a template: Using your spirit level and the measurements you’ve taken, mark each hole position with a pencil. Once marked, double-check that they are level.
With a template: Use your level to ensure the template is straight, then fix it to the wall.
Use a pipe detector to check for any hidden pipes or electrical cables. Once you’re certain the area is clear, use a bradawl or screwdriver to mark each drill point.
If you have used a template, remove it from the wall after marking the drill positions.
5. Set up your drill
Your screws will typically require drill bits between 4mm and 6mm in diameter. You also need to know how deep to drill into the wall – use the rawl plug as a guide for this. Some power drills have a depth stop; if yours doesn’t, wrap a bit of masking tape around the drill bit at the required depth to serve as a simple marker.
6. Use paper envelopes as dust catchers
Take a couple of paper envelopes and tape one below each drill point, with the opening facing upwards to catch falling dust. Use masking tape to secure both the back of the envelope to the wall and the flap so it stays open. Double-check all your measurements, and if everything looks correct, cover the TV with the dust cover, securing it with masking tape along the underside.
7. Drill each hole
Drill each hole to the marked depth, then insert the rawl plugs. Fix the screws using a screwdriver, leaving around 5mm of the screw head protruding so the soundbar can slide on and lock into place. Once mounted, check that the soundbar is level. If it’s slightly off, small grommets can help adjust the alignment.
8. Clean up and route cables
Clean up, remove all masking tape and vacuum, then route all cables.
FAQs
What is the best soundbar to buy?
The best soundbars on the market right now include the Sennheiser AMBEO Max, the What Hi-Fi? Awards 2024 winner, and the more affordable Klipsch Flexus Core 200. You can find more options on our list of soundbar top picks.
Is it OK to mount a soundbar to a wall?
It is fine to mount a soundbar to a wall, and in fact, they work better this way. When they’re attached to a wall, they’re elevated closer to ear height and any unwanted reflections from a cabinet are removed.
How do I hide soundbar wires on a wall?
There are many cable tidy and trunking solutions that will create that clean look, but if you have access behind the wall, you can also feed your cabling this way for a floating look.
Final thoughts
I’ve aimed to cover the basics of how to mount a soundbar to a wall without overcomplicating the process. If any step doesn’t go to plan, it’s best not to continue until the issue is resolved. Seek assistance or get in touch with the team at AV.com to let us know which step you’re stuck on – there’s always an alternative solution.


0 Comments