")


Mounting a projector need not be a difficult task. With proper preparation, you can avoid stress, confusion, and misplaced drill holes altogether.
This article will guide you through how to mount a projector in eight steps. Half of these steps are crucial decisions you must make in preparation for installation. If you don’t want to mount your projector to a wall or ceiling, I will also offer some alternative solutions throughout.
Perhaps you’re already a projector owner checking how best to mount it, or maybe you’re in the planning stages, yet to purchase your equipment. Regardless of your current situation, we’ll discuss how crucial it is to pre-plan before undertaking any installation. By the end, you’ll, hopefully, appreciate that careful planning is just as important as the physical act of mounting the projector itself.
In a Hurry?
Here’s a quick guide to mounting a projector:
| Preparation | 1. Choose where you want your screen to go; account for space, ambient light, and eye level |
| 2. Check your projector’s throw ratio to determine its position relative to the screen | |
| 3. Locate the studs or joists in your wall/ceiling to establish the sturdiest mounting points | |
| 4. Select an appropriate wall or ceiling mount for the nominated mounting point | |
| Mounting | 5. Attach the mount, level it, and secure it as per the mounting instruction manual |
| Fine-Tuning | 6. Once you’re happy with the mount, attach the cables and consider filtering them through a cable management system |
| 7. Power up your projector to make sure everything works as it should | |
| 8. Make final adjustments to focus, zoom, and lens shift on the projector itself |
You Will Need…
- Projector
- Projector screen
- Projector mount with all the screws, bolts & anchors
- Ladder or step ladder
- Screwdriver
- Drill
- Wrench or allen wrench
- Tape measure
- Pencil
- Level tool
You Might Also Want…
- Stud/joist finder
- Cable management system
How to Mount a Projector
Mounting a projector isn’t as daunting as it might initially seem. The process can be split into three manageable stages: preparation, mounting, and fine-tuning. With diligent planning throughout the preparation stage, the installation itself might not take very long at all!
So, before you jump at your projector with a drill in hand, there are a few crucial preparatory decisions to make. These decisions lay the groundwork for a successful and safe installation, ensuring your projector has the best chance of performing at its best.
1. Decide where you want your screen (the preparation stage)
The first decision you need to make concerns the location of your projector screen. Why does the screen matter in a guide about projector mounting? Well, it’s the room’s focal point; the whole entertainment experience revolves around it.
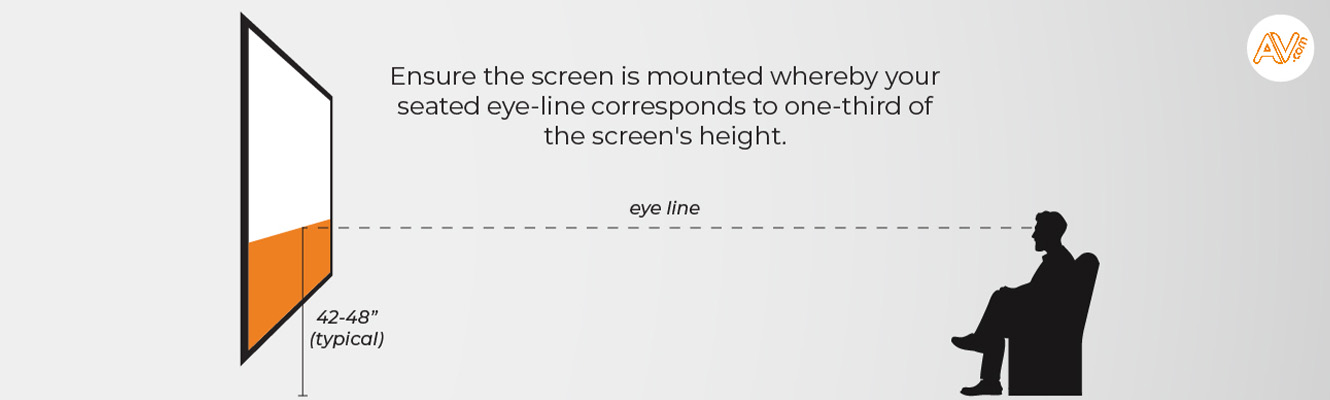
Ask yourself what size of screen you want and where this would fit. Consider whether your ideal screen location gets a lot of natural light and if seating can be arranged comfortably in front of this. To ensure that ‘best seat in the house’ feeling every time, try aligning the seated eye level to 1/3 of the way up the screen.
For help choosing the right projector equipment, our article on Laser Projectors vs. Lamp Projectors covers how your room conditions can make a difference. For tips on creating a true cinema ambience at home, check out our Cinema Room Ideas.
2. Decide on the projector placement
Next, it’s time to think about projector placement. This will be determined by the throw ratio, which is the distance between the screen and the projector. You can typically find a projector’s throw information in its user manual. Otherwise, most projector brands have helpful throw-distance calculator tools: Sony, Optoma, Epson, JVC, BenQ.
If you already have a projector, its throw ratio will dictate where you can mount it. If you haven’t chosen a projector yet, you have a little more flexibility; you can decide roughly where you’d like to place it, choose a projector with a throw ratio to facilitate this, and move on to step 3.
Typically, only standard/long-throw and short-throw projectors need to be mounted to ceilings or walls. Ultra-short throw (UST) projectors are more commonly placed on a table or other surface close to the screen. However, mounting them can still save space, reduce the risk of the projector being bumped or moved, and ensure a stable, fixed position.
Once you’ve figured out the right distance range, lightly mark this on the ceiling or wall for future reference.
3. Ensure you have a sturdy mounting surface
Whether you’re mounting a projector on the ceiling or wall, the surface needs to be strong enough to support the projector’s weight. If you’re going to be mounting to the ceiling, make sure to locate a ceiling joist. For wall mounts, find a stud to provide the necessary support.
You can use a stud/joist finder to help you locate these. Ideally, you’ll need to find a stud/joist within the appropriate throw distance identified in Step 2.
4. Decide on the best mount
Once you’ve established the ‘where’, it’s time to settle the ‘how’. By that, I mean how will you mount the projector, and with what?
There are various types of mounts available and the one you choose depends on factors such as throw distance, lens shift capabilities, projector weight, and room conditions.
Long or standard throw projectors typically benefit from being ceiling mounted while shorter throw types can be wall, table, or stand mounted for closer screen proximity.
Room conditions like vaulted ceilings or beams (which might obstruct a ceiling mount) may call for wall or shelf mounting solutions. This is one reason why considering your room conditions should be crucial to your choice of projector.
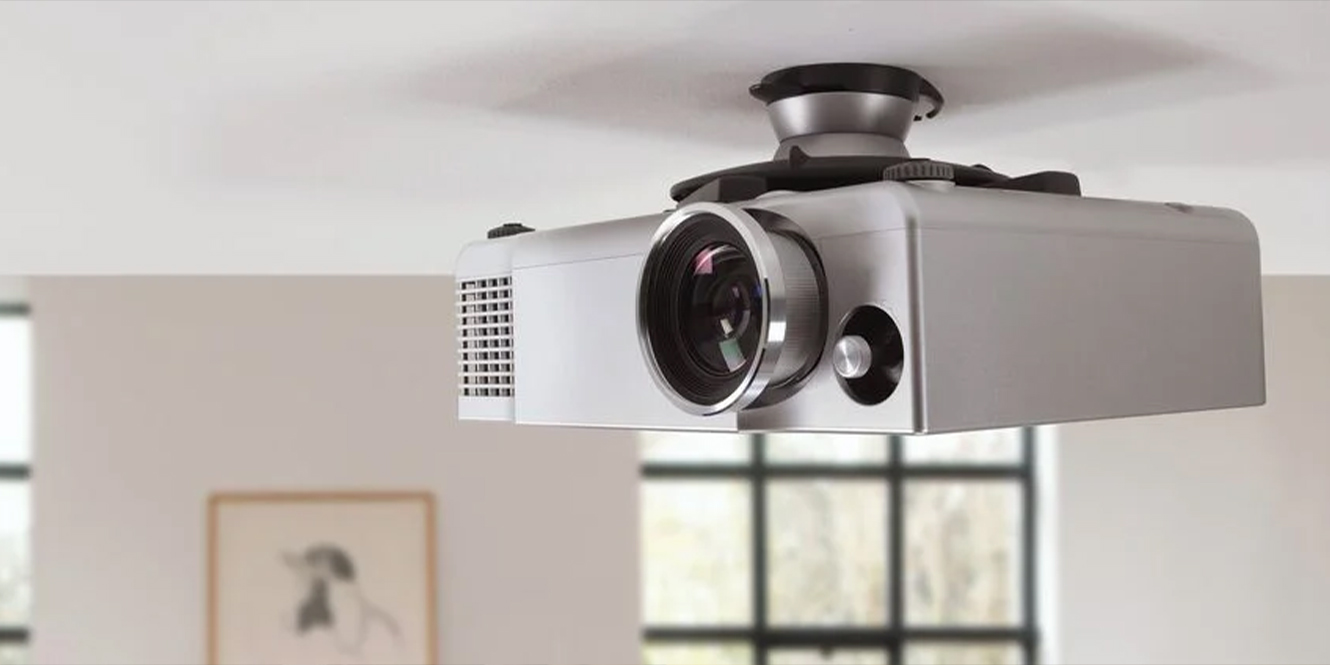
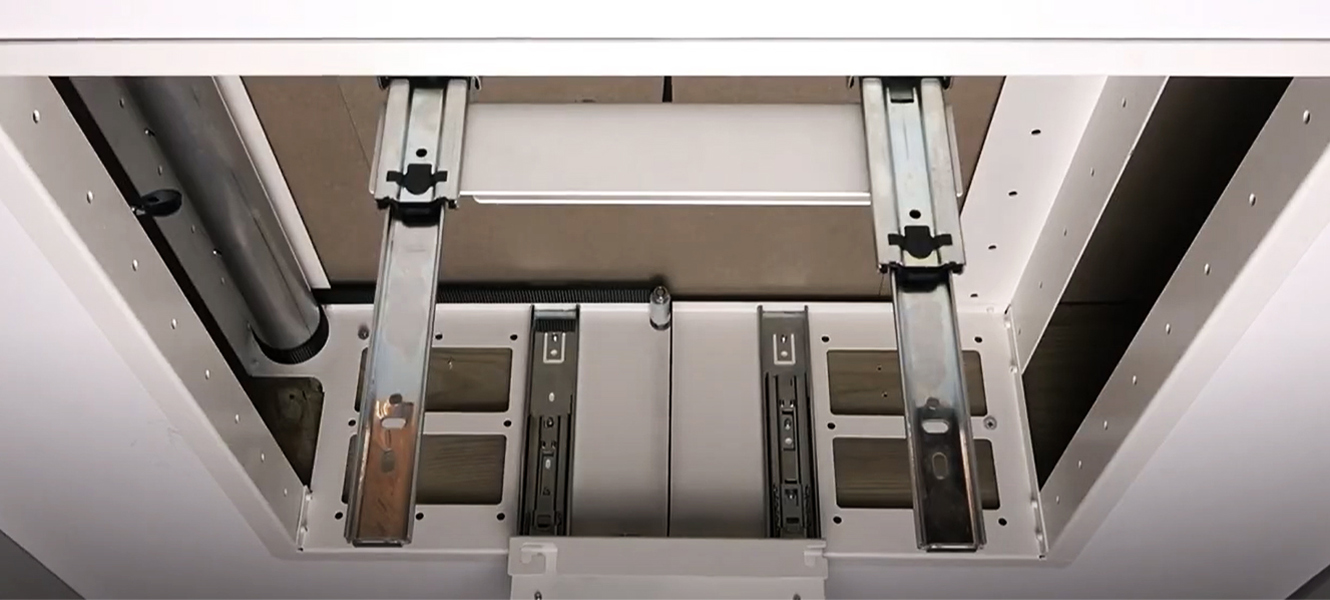
If you can mount your projector from the ceiling, one of the most desirable ceiling mount types is the projector lift. This conceals your projector in the ceiling and lowers it electronically when needed for use.
Whichever you choose, ensure it can securely hold your projector’s weight.
5. Attach, Level, Secure (the mounting stage)
Once you’re all prepared with your entertainment setup mapped out, go ahead and whip out all the instruction manuals and give them a thorough read-through.
If you’re using a projector lift, you’ll need to create a ceiling cutout for this to fit into before anything can be attached.
Attach the mount to your predetermined spot or into your ceiling cutout, ensuring it’s level and aligned with your screen.
Secure the projector following the manufacturer’s instructions. Carefully place the projector onto the mount and tighten it securely. Different projectors may require different methods of attachment, so refer to your manual for the correct procedure.
6. Connect the cables (the fine-tuning stage)
The sixth step is to connect the cables. This involves running the power cable and any necessary video or audio cables from the projector to their respective sources. To maintain a clean look, consider using cable management solutions like cord covers or conduits.
7. Plug in and power
For the penultimate step, plug the power cord into an outlet and turn the projector on. If everything is installed correctly, you should see the projector’s start-up screen on your display. This may take a minute or so if your projector has a warm-up period.
8. Make the final adjustments
Finally, adjust the projector’s tilt, projection, and image settings to your preferences. Using the projector’s built-in settings, adjust the focus, zoom, and lens shift until the image is clear and fits perfectly on your screen. Adjust image settings such as brightness, contrast, colour, and keystone correction before playing a test video to see what you think of your changes.
It may take a bit of tweaking, but soon you’ll have a home theatre experience tailored exactly to your tastes.
Shop Projectors and Accessories
Find the projector, screen, and mounting equipment you need today, or browse all things AV at AV.com.
More Top Tips for Mounting a Projector
Here are some extra snippets of advice for projector mounting, including alternative methods and the best mounting method on a budget…
- If you’re mounting a projector to the ceiling, remember to consider your nearest power supply. Do you have a power supply in the ceiling? Can you add one?
- You’ll need a media source connected to your projector; consider how you’ll hide HDMI or other cables which run between the projector and the media source
- Make sure your video cables are high-quality and a suitable length; click here for more advice about HDMI cables
- If you’re ceiling mounting a lamp projector, make sure to check the lamp’s lifespan; you may need to reach the projector to clean or service it at some point
- Shelf mounting is probably the best mounting solution for those on a tight budget. It can be a DIY project, just make sure to account for the weight of your projector
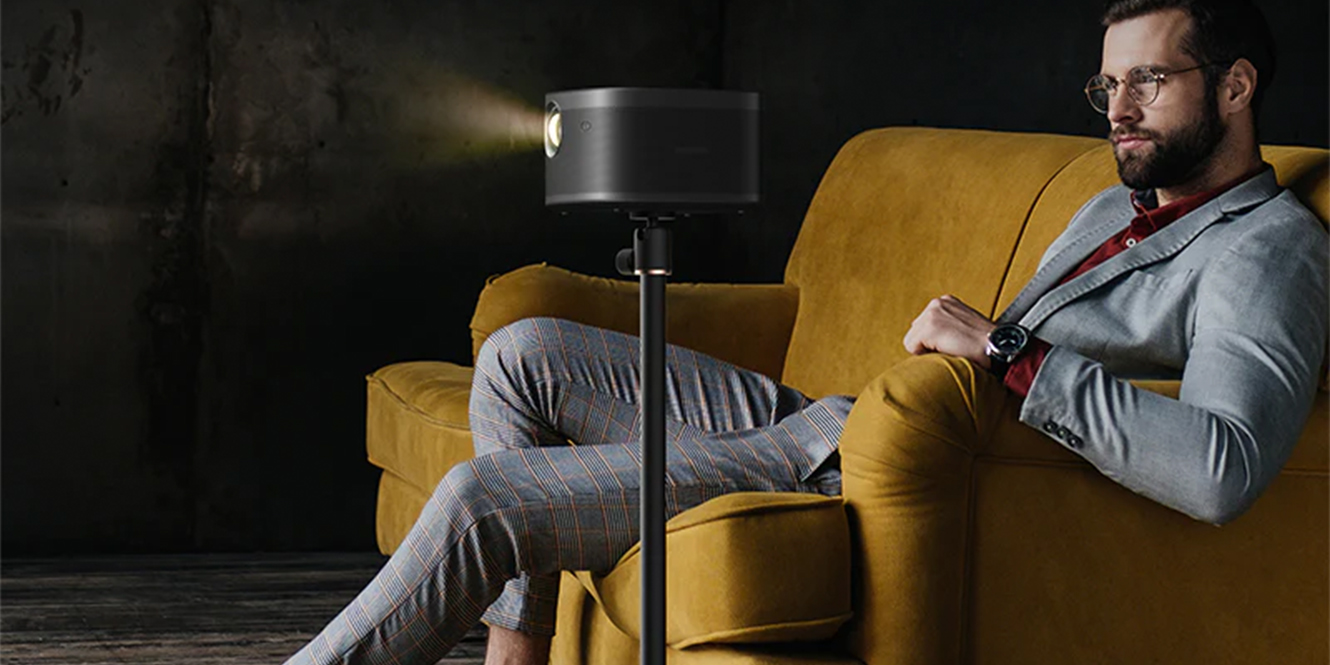
- If you don’t want to/can’t mount your projector to a wall or ceiling, consider a projector stand or a UST projector which can sit on a cabinet beneath your screen
FAQs
Does a projector need to be mounted?
Mounting a projector is not essential but can better the viewing angle and increase stability. Some projectors will benefit from being mounted more than others, for example, ultra-short-throw (UST) projectors are often positioned on a table or cabinet beneath the screen. Long-throw projectors, however, are better off mounted high up to prevent obstructions.
What can I stand my projector on?
Projectors can stand on various surfaces such as tables, shelves, or dedicated projector stands. The surface should be stable, flat, and at an appropriate height for optimal image projection. It’s essential to ensure that the chosen surface can support the projector’s weight and doesn’t expose it to hazards like spills or knocks.
How do you mount a projector without drilling?
Mounting a projector without drilling is achievable with adhesive mounts or tension rod systems. Adhesive mounts attach to the ceiling with strong adhesive, while tension rod systems use pressure between the floor and ceiling. Both of these methods avoid damage to walls or ceilings but require careful installation. Alternatively, you could use a freestanding shelf unit if you’re concerned about the weight of your projector.
Final Thoughts
Mounting a project might seem daunting at first, but it can be seamless if you prepare well and closely follow the user manual supplied with your mounting kit. Remember, the best results not only come from good DIY skills but also from thorough research and planning. We hope our guide to how to mount a projector has helped take the stress out of the whole process!
With the step-by-step instructions, additional tips, and alternative methods provided in this article, your dream projection setup is sure to become a reality soon. In the meantime, why not continue the research? Read more about related topics below…


0 Comments