")


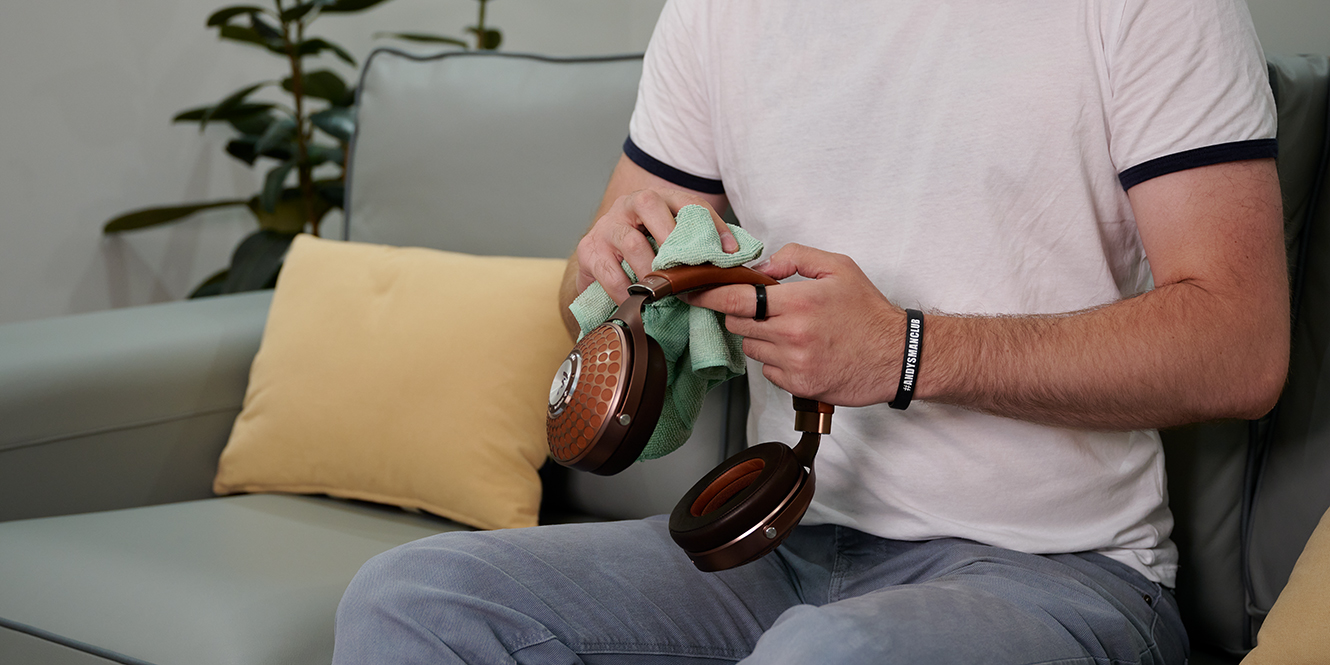
Ears are kinda gross. They naturally produce wax and oils, and when you wear headphones often, that build-up finds its way onto the cushions, tips, and even inside the grilles – not to mention hair and dandruff, if you’re so inclined. Knowing how to clean your headphones is worth a bit of attention, but if you’re short on time, there’s really only one golden rule:
To clean your headphones, start by gently wiping down hard surfaces with a soft, dry cloth. For stubborn grime, lightly dampen the cloth with mild soap and water, being careful to keep moisture away from any electrical components. With the right approach, your headphones will look fresher for much longer.
Key takeaways
- Always turn off or unplug your headphones before cleaning
- Use a lint-free cloth, mild soap, and a soft brush to remove grime without scratching surfaces
- Let everything dry completely before reassembling or using your headphones
What you need
Most items you need to clean your headphones can be found around the house.
- Lint-free or microfibre cloth
- Warm water (distilled if possible)
- Mild soap or dishwashing liquid
- Alcohol-free disinfectant wipes
- Toothpick or plastic cleaning tool
- Time – to ensure everything dries properly
Make sure everything you use is non-abrasive to avoid damaging delicate materials.
How to clean headphones – a step-by-step guide
1. Turn off/unplug headphones
Before you do anything, make sure your headphones are off!
For wired headphones, this means disconnecting them from your source. If they’re wireless, power them down completely. This is the most important step, and prevents any accidental short circuits during cleaning. If your model has detachable ear tips, take those off too. It’ll give you better access and ensure nothing gets damaged by moisture.
2. Remove any dust and debris
Start with the loose stuff. Pick away any hair or flecks, then using either a dry cloth or a can of compressed air, clear away dust. Next, focus on the crevices around the ear cups, grilles, and joints using something pointed but gentle, like a toothpick or plastic cleaning tool. Go slowly and don’t use anything sharp or metal, as this may scratch.
It’s important to do this step first because if this debris gets wet, it can clump up, or worse, lodge itself into your headphones.
3. Clean the hard surfaces
Next, fill a bowl with warm water and add a small squirt of mild soap to create a gentle cleaning solution (you’re not aiming for a basin of bubbles). Washing-up liquid works well too, as long as it’s free from harsh chemicals or perfumes that could leave residue.
Wipe down the headband, exterior ear cups, and cables with a cloth dampened (not soaked) in the water mix. For more stubborn spots, rub gently in a circular motion.
4. Wipe down the ear cushions
Ear cushions tend to absorb oils and sweat, especially if you use your headphones for long sessions. Use your dampened cloth to gently wipe them down, taking care not to oversaturate the surface, particularly if they’re made of foam.
Many brands also offer headphone spares, including ear cushions, so if yours are looking worn or starting to flake, it’s worth checking if spares are available.
5. Wash the removable ear tips (if cleaning earbuds)
For in-ear headphones or earbuds, remove any silicone tips and soak them in warm, soapy water for a few minutes. This helps to loosen any earwax or dirt. Rinse them under running water and let them dry on a clean towel. Only reattach the tips once they’re fully dry to avoid trapping moisture inside the earphones.
6. Use alcohol-free disinfectant wipes if needed
If you’re sharing your headphones or have used them during exercise, you can wipe down non-porous surfaces with an alcohol-free disinfectant wipe. This will help kill bacteria without drying out rubber or plastic components. Avoid using wipes on fabric or foam parts as these can break down over time with regular exposure.
7. Dry thoroughly
Once you’ve finished cleaning, let all parts air dry completely before reassembly. This is especially important for ear tips and cushions, which can trap moisture if put back too soon. Damp components can affect fit, sound quality, and encourage bacteria, which can lead to ear irritation or infection.
Be patient. Leave everything in a well-ventilated spot for a few hours, or overnight if possible. Avoid using a hairdryer, heater, or radiator, as this is more likely to warp materials.
Why is it important to clean your headphones?
Headphones are something you wear, and considering how easy it is to spend into three figures for premium sound, proper maintenance just makes sense.
Sweat, grime, and oils build up over time and wear down materials, dull audio when they clog grilles, and can lead to skin or ear irritation if ignored. Additionally – and I can’t stress this enough – anything that’s designed to go inside the body, especially in the case of earphones, should really be cleaned regularly. You wouldn’t use the same cotton bud twice.
Things to avoid
Avoid harsh or abrasive cleaners, as these can scratch plastic, strip paint, or damage protective coatings.
Keep moisture away from speaker grilles, buttons, and charging ports. Liquids and electronics don’t mix, even if your headphones are water-resistant, and moisture can corrode internal components over time.
Finally, don’t rush the drying process. Avoid shortcuts like hairdryers or bowls of rice, as they’re more likely to warp materials or lodge debris into connection or charging ports.
FAQs
How do you clean earwax out of headphones?
To clean earwax out of your headphones, use a soft, dry brush or cloth to gently wipe buildup from your speaker mesh. For stubborn wax, a small amount of isopropyl alcohol on a cotton swab may help. Always avoid liquids seeping into the internals, as this may damage your headphones.
How do you get rid of stinky headphones?
The best way to prevent stinky headphones is regular cleaning with a damp cloth. Always make sure your headphones are fully dry. If odour persists, use rubbing alcohol or a natural, mild disinfectant. Replace earcups if the smell lingers, as bacteria causing the funk may be deeper than surface level.
How do I clean my headphone port?
To clean your headphone port, power off the device and blast loose debris with compressed air. Then, gently insert a thinned cotton swab moistened with isopropyl alcohol to clear grime. For stubborn bits, use a toothpick tightly wrapped in tape, sticky side out, to lift blockages like a lint roller.
Final thoughts
When you’re looking up how to clean your headphones, there’s always someone swearing by some miracle hack. But let’s be honest, time moves forward, dirt builds up, and materials wear down. Scratches and scuffs are just signs of a well-loved pair of headphones.
The good news is that regular cleaning is all it takes to keep them in good shape. You don’t need to do every step we mentioned every time you clean. A quick wipe now and then, or after a particularly sweaty gym session, makes all the difference. No gimmicks, no fancy gear, just a few minutes of cleaning and patience while it dries…
Oh, and of course, “wash behind your ears!” Turns out that’s good advice too.


0 Comments